Showing posts with label Raspberry Pi. Show all posts

Tuesday, January 9, 2024

Samba from Raspberry Pi - Rejected an insecure guest logon [Solved]

This post is about troubleshooting connectivity issues to Raspberry Pi when accessing an SMB shared path.

Context

The aim is to expose a NAS from Raspberry Pi using Samba. It should be accessible only with authentication. The good thing in Windows is that it disables the anonymous access by default¹.
For authenticating there is a user created in Raspberry Pi. Below is the design.

Problem

When accessing SMB share from Windows 10 machine, it error out with

"\\raspberrypi.lan is not accessible. You might not have permission to use this network resource. Contact the administrator of this server to find out if you have access permissions.

You can't access this shared folder because your organization's security policies block unauthenticated guest access. These policies help protect your PC from unsafe or malicious devices on the network."

The event viewer shows the below.

Rejected an insecure guest logon.

User name: <user name>

Server name: \raspberrypi

Guidance:

This event indicates that the server attempted to log the user on as an unauthenticated guest and was denied by the client. Guest logons do not support standard security features such as signing and encryption. As a result, guest logons are vulnerable to man-in-the-middle attacks that can expose sensitive data on the network. Windows disables insecure guest logons by default. Microsoft does not recommend enabling insecure guest logons.

Analysis

It says the attempt is made as an unauthenticated user. But the dialog box for login was present and entered the username and password.

Root cause

The credentials were wrong. When the password was wrong, instead of telling wrong user name or password, it fall back to unauthenticated anonymous user access and that is rejected.

Why it takes that fall back?

It is bacause of a setting in Samba. The setting name is "map to guest". The default value is 'Never'² but the value was somehow different.

Solution / Fix

Make sure the smb.conf has "map to guest user" = 'never', if we want to enforce only authenticated users accessing the share. May be we can leave it as the default value is 'never'.

More more details refer Ansible scripts³ in previous post in this blog.

Happy debugging...

References

Tuesday, December 12, 2023

Setting up home NAS - Part 7 - Automate using Ansible

This is the continuation of the "Setting up home NAS" series. Better read the below posts to get context.
Setting up home NAS - Part 7 - Automate using Ansible

Introduction

Previous posts have manual instructions to set up the Raspberry Pi to function as a NAS and Plex media server. As we all know manual steps are error-prone and difficult to replicate. This post is about automating the deployment and manual configuration steps.

Architecture

There are different approaches to automating the machine configuration and software deployment.

The easy way is to simply write scripts and get them executed in the target machine itself. Here target is Raspberry Pi and Ansible supports this method and lets us install it on Raspberry Pi.

Secondly, agent-based¹ where we first manually install an agent software that polls the central repository of configuration. In case there are any changes, it will apply those to the host machine where it is running.

Another way is the opposite of agent-based. A controller machine pushes the changes to the target machine using some remoting technology. Here the target is Raspberry Pi


Here we are using an agentless method using a tool called Red Hat Ansible². Ansible is a well-known tool in IT automation workflows.

SSH to Pi with keys 

Since there is no agent to listen in, the controller machine needs to use a way to remote into the target machine to be configured. Ansible uses SSH³ to do the same.

The default way is to run the Ansible scripts and it will ask for login details. For Raspberry to set up that is fine. But there are ways to avoid it by using the SSH public-private key pairs.

There are clearly documented ways to establish a passwordless login to RasPi⁴ using SSH keys. But there are chances of things going wrong and troubleshooting SSH keys to authenticate should be a separate post on its own.

Installing Ansible

It requires Python to be installed. The installation of Ansible is straightforward and well documented⁵.

Source code

Enough theory. Since it involves scripts that can be enhanced later, it is better to keep in a source control repository. Below is the source code repo link to GitHub.

https://github.com/joymon/ansible-raspberry-home-nas-plex

The readme.md is pretty much updated.

One thing pending is the setting up of the user password that is used to access the shared path from Raspberry.

It will be added soon and updates will be pushed to the same repo. 

Ansible in Windows v/s Linux

One drawback is that Ansible is not very compatible with Windows as a controller. So we have to use the WSL2 feature of Windows to manage the target Raspberry Pi.

Reference

Tuesday, December 5, 2023

Setting up home NAS - Part 6 - Raspberry Pi as Plex Media Server

This is the continuation of the "Setting up home NAS" series. Better read the below posts to get context.
Setting up home NAS - Part 6 - Raspberry Pi as Media Server using Plex (This post)

Introduction

This post discuss how to enable Plex media server on Raspberry Pi and use within home network.

Approach

At high level we have to do the below steps
  • Enable Plex package sources and install Plex
  • Browse to http://raspberrypi:32400/web and associate with our Plex account
  • Configure the Plex to include our media folders
Let's start.

Enable Plex package sources and install Plex

Below goes the Linux commands to do the same. It needs to be run on Raspberry.

sudo apt-get update
sudo apt-get upgrade
# Enable the package install over https
sudo apt-get install apt-transport-https
# Adding the Plex GPG key
sudo curl https://downloads.plex.tv/plex-keys/PlexSign.key | sudo apt-key add -
# Add the Plex package sources to the apt.
# It basically creats a file with the deb ...
sudo echo deb https://downloads.plex.tv/repo/deb public main | sudo tee /etc/apt/sources.list.d/plexmediaserver.list
# We’re going to update our package list and install from the newly added repository.
sudo apt-get update
sudo apt-get install plexmediaserver

Added some comments to understand. In case of queries, please add comments. Once Plex is installed we need to configure.

Browse and associate with Plex Account

First naviate to http://raspberrypi:32400/web . The port 32400 is the default port for Plex. Please make sure the protocol prefix is http not https. It will load the screen as follows.


Note that the URL changed from our RaspberryPi host name to app.plex.tv after some redirects. Click on sign-in and use approprate method. Once signed in, it will redirect back to the page as shows below.

At this point our local RaspberryPi hosted Plex is connected to the credential we provided.


This is simply saying how it works. Once you click on got it. It asks for the Plex pass.


It we can, better support them by buying the pass. Yes, it supports totally free mode as well. We can click on close button to skip payment. Up on closing it will take to server setup.

We can see it can expose our media accissible from internet. In order to do that we need a router that is supporting UPnP or NAT-PMP feature. Also the port forwarding to 32400 ¹. This tutorial is moving forward to restrct access only with the home network, not internet. In case we change our mind, it can enable later as well.

The next step is to add our media folders to the Plex.

Click on the add library 

This tutorial is adding an audio library of type Music.
The library name will be Music. Click next.
Click on 'Browse for Media Folder' to get the media folder selection screen.

Browse the folders or enter the path to our folder containing audio files. This is the path in Raspberry. The path in the screenshot is where the external hard drive is mounted that contains files. Click on the "Add" button and will land on the next screen.
Click on the add library to add finish adding folder to Plex.

The same task of adding folder(s) can be done after completing the initial setup also. Click on Next.

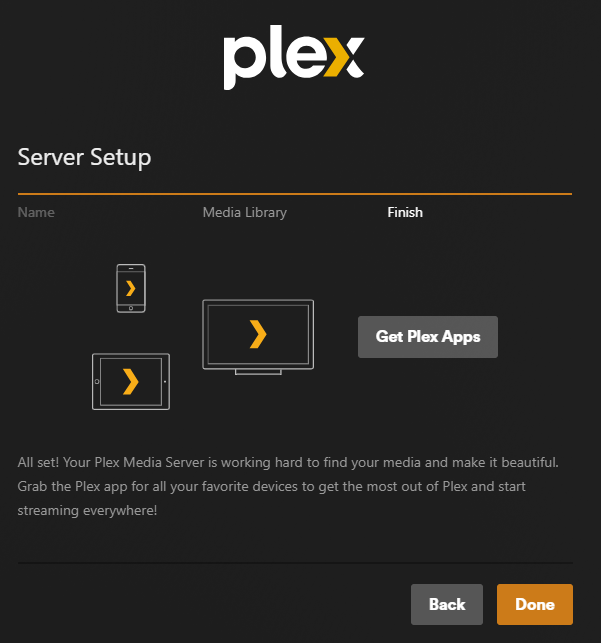
At last we are done by clicking the "Done" button. It is time to navigate to the Plex that we setup. Browse to http://raspberrypi:32400/web and we will reach the screen as below. 
Again please note the Url protocol is http not the secure https.
What ever content we are seeing in our home page is free to watch from Plex. They change over time. These are not from our Raspberry Pi server. In order to see the personal contents hosted on Raspberry Pi, click the More button.
Here comes our personal content. Remember we created the Music library during the setup, that is what visible here.

Now it is time to access it via the Plex web site. Naviagate to https://app.plex.tv in the browser.
We can see our personal contents added to Raspberry Plex server here as well. Even the web site is app.plex.tv, it is able to get data from Raspberry due to the connection we established between our Plex credentials and the Plex server during the setup.

In case there are issues like secure connection issue as shown above, we need to wait till the DNS is propagated. Plex is using some documented magic² to retrieve the contents from Raspberry Pi to their web site and apps through our home network.
Since it is magic sometimes it won't work due to specifics of settings in our network such as router configuration. If all works fine, we can browse https://app.plex.tv and view the contents. Also, it works with the other  Plex app supported media players such as smart TVs, mobiles etc...

Configure to include our media folders

If we need to add other folders to Plex, mouse over the name of server (here it is Raspberrypi) use the + button and point to the right media folders in Raspberry Pi.

Media organization

Note that when we add the folder, Plex has to do indexing behind the scene to a database³. Depending on the storage speed and Raspberry specs, indexing time varies. After indexing only the media files will start showing up in the UI.
When we add new media files or remove, we need to run scanning⁴ again to update the Plex index.

If there is more interest, have a look at the below references. Have fun with Plex.

References

Tuesday, November 7, 2023

Raspberry Pi - Fixing NAS (via SMB) slowness

This is a continuation of the Home NAS series, especially on how to increase the speed. The NAS is set up on a Raspberry Pi 4 B model. One of the older posts was debugging of NAS slowness and it concluded that the WiFi-5 is the bottleneck. Either Raspberry needs to be connected via cable or needs to use WiFi-6. Since the WiFi-6 is not natively supported by the RasPi the only option left was to connect via wire but it requires cabling through walls which is really a high effort. The cable-based internet connection is on the main level and the data center is upstairs. The data center here refers to a small rack where RasPi,2 external hard disks, and another laptop are sitting and running without GUI.

Move to 5G home internet

Fortunately or unfortunately the coaxial cable-based internet provider Xfinity increased their pricing which triggered the search for better options. Very quickly it landed on 5G home internet providers. Cheaper in price, ultra-fast connection in my area, is portable, has a WiFi-6 router built-in, etc...

Why T-Mobile?

There is no affection towards them also please note that I am not affiliated with T-Mobile in any way also this post is not sponsored by them. It is cheaper and one of my friends has it and has given good feedback. Also, it has 2 ethernet ports which seems normal in any modem-router combo.

Speed tests

As usual, I checked the speed using the same iperf3 tool before installing the 5G gateway. This is important as our previous test results may not be true now.

Yes, it is still slow. This will give a max of 10 MB/s only when copying files from NAS.

New setup

The RasPi also the client machine connected via wire and the readings are below.

Wow definitely higher than expected. It is time to copy a file and check the speed.
Yes, it is faster. This concluded that the SMB or anything in the RasPi or OS was not the problem. The network was the problem.

The Wi-Fi 6 test

Lastly, the Wi-Fi 6 test was also performed.

It is given great performance but not to the expected level. Anyway, the Wi-Fi was kind of free. It is wise to invest in a Wi-Fi 7 router when it arrives at an affordable cost after standards are finalized.

The table below is for reference.

RasPi NetworkDestination Networkiperf3 reading
Wi-Fi 5Wi-Fi580 Mbits/sec
WiredWired771 Mbits/sec
WiredWi-Fi6394 Mbits/sec

Bonus screenshot below that shows the internet speed test.

Tuesday, August 1, 2023

Raspberry Pi - Why my NAS (via SMB) is slow

Problem

As seen below, when I want to move files to and from my NAS, I DIYed. It was a little better before I moved to the new house.

Specs

  • Raspberry Pi 4 4GB is hosting the NAS
  • Both RasPi and client Windows machines are in WiFi 5 (In the old 1BHK apartment all were nearby and used LAN cable)
  • RasPi is hosting another service such as Plex.
  • Seagate Backup Plus 8TB HDD (not SSD) connected to usb3
  • HDD uses NTFS file system than Linux native etx4
  • Uses SMB3 protocol
There are many guesses or options people are talking about on the internet, from converting NTFS to ext4 to buying a dedicated NAS device, etc...Let us go the scientific debugging route.

Hypotheses

Slow HDD access

There is a bottleneck in the connection between HDD and the RasPi.

Testing

There is a utility called hdparam in Linux to test the connectivity. Below goes the result.

Status

Rejected as it is showing better numbers.

Slow network connection

Due to the WiFi 5, it is slow in communicating between machines

Testing

There is a utility called iperf3 to test the network speed.

iperf3 to local network
iperf3 test to a public server

Result

The hypothesis is true that connectivity is the bottleneck. Either upgrade to use WiFi 6 which RasPi 4 doesn't support out of the box as well as most of my machines.

Next steps

Have some way to connect the RasPi and possible machines via ethernet cable. The wiring may be required.

Tuesday, March 22, 2022

Setting up home NAS - Part 5 - e-mailing rsync report

This is the continuation of the "Setting up home NAS" series. Better read the below posts to get context.

Setting up home NAS - Part 5 - e-mailing rsync report (This post)

Introduction

In the previous post, we saw how a RaspberryPi can be used to build locally redundant NAS. We used rsync command to copy folders and files from the primary hard disk to the secondary. There was no way to monitor whether it works every day. This post is to explain a monitoring mechanism that is nothing but sending a summary mail at end of every sync operation daily.

Approach

The high-level solution goes as follows
  • Have the rsync commands output logs to a folder
  • Merge the individual rsync reports into a single file by taking only what we need. This is what we are going to email every day. Not the raw rsync output.
  • Send the report using the appropriate email provider. 

Prepare the report

This includes the generation and formatting of rsync report

rsync to output logs

The rsync command that we saw in the previous post needs to be modified a little bit as follows

rsync /media/usbseagate1tbc/media/ /mnt/router/media/ -av --progress --delete --out-format="%t %f %''b" >> "/var/log/j3dnas/$(date +%F)/Media.log" 2>&1

This means the output of rsync will be saved to a dated folder with the required format. The path needs to be changed as per our setup. 

The rsync command has a lot of options to choose the log format. Experiment with those to tune the format.

create directory if not exist

In case the directory named with the current date is not there, create it as follows.

mkdir "/var/log/j3dnas/$(date +%F)" -p

Merge rsync logs with grep

If there are multiple folders we are syncing it will produce multiple log files. Those can be merged using the below simple grep command.

grep "$(date +%Y/%m/%d)\|deleting\|error\|failed" --no-filename /var/log/j3dnas/$(date +%F)/*.log >> "/var/log/j3dnas/$(date +%F)/status.txt"

grep has many options similar to rsync. Explore to tune the merge output. Before appending the logs add the subject line. The mailing libraries will take the first line as the subject of the mail.

echo -e "Subject: J3D Family NAS rsync status $(date +%F)\r\n" >> "/var/log/j3dnas/$(date +%F)/status.txt"

The merged status.txt file is what we will be sending in the email.

Sending eMail

Choosing mail provider

Gmail comes to our mind when we think about mails. We can use it to send mails here. It uses 587 port. Based on our experience it can be any mail provider. The main point to consider is they support SMTP to send mails.

Once the service provider is decided, create a new email account or use any existing account that is already in use to send these types of notifications. 

Mailing library

Next, we need to decide on what email library/command to be used. Personally, I started with ssmtp but later I found that ssmtp won't work in the latest Raspberry Pi. Finally ended up with msmtp. More on how to send mail from RasPi using msmtp can be found here. The credentials need to be stored in the /etc/msmtprc file.

In case there are issues in using the plain password of the email account, use the app password method of Google to send the email.

cat /var/log/j3dnas/$(date +%F)/status.txt | msmtp  --debug --from=default -t joymon@gmail.com

The command to send mail will be like the above.

Final script

The final script will look something like the below.

#!/bin/bash

mkdir "/var/log/j3dnas/$(date +%F)" -p

# rsync and log output to datewise folder

rsync /media/usbseagate1tbc/users/ /mnt/router/users/ -av --progress --delete --out-format="%t %f %''b" >> "/var/log/j3dnas/$(date +%F)/users.log" 2>&1

rsync /media/usbseagate1tbc/Media/ /mnt/router/Media/ -av --progress --delete --out-format="%t %f %''b" >> "/var/log/j3dnas/media_$(date +%F)/Media.log" 2>&1

# Push the email subject and modified file list to the status file

echo "Subject: J3D NAS Sync Status $(date +%F)" > "/var/log/j3dnas/$(date +%F)/status.txt"

grep "$(date +%Y/%m/%d)\|deleting" /var/log/j3dnas/$(date +%F)/*.log >> "/var/log/j3dnas/$(date +%F)/status.txt"

# Send mail

cat status.txt | msmtp  --debug --from=default -t joymon@gmail.com

Tuesday, August 31, 2021

Install .Net Runtime and run .Net apps in Raspberry Pi 4

Here we are continuing the experiments with Raspberry Pi 4. As a .Net developer, what is the meaning if we cannot install .Net into RasPi and run one program?

Please note this post is aiming at installing the .Net runtime, not the SDK. Development and compilation will be done outside of RasPi. Also, this is not aiming to run ASP.Net, just simple .Net console apps only.

Do we really need to install .Net runtime to RasPi?

It depends. If we want to run a self-contained application, there is no need to install the .Net runtime. Follow the below steps as mentioned in Microsoft docs.
  • Publish with the 'linux-arm' option.
  • Copy the folder to RasPi
  • Give execute permission
  • Run the app

It worked like a breeze. But the self-contained publish model includes the runtime and is really big. The above screenshot shows the size is around 80MB for a simple console application. To avoid that, we can install the runtime.

Attempt 1 - Install the apt-get way

When we google, we get the answers that we have to execute some scripts to install .Net runtime. The sudo apt-get is nowhere available. But I decided to give it a try using the Microsoft tutorial targeted to Ubuntu 21.04.
It failed gracefully with a series of messages

 "E: Unable to locate package dotnet-runtime-5.0
E: Couldn't find any package by glob 'dotnet-runtime-5.0'
E: Couldn't find any package by regex 'dotnet-runtime-5.0'"

The screenshot is given below

Let us do the next attempt.

Attempt 2 - Install using the scripts 

This time let's follow the Microsoft link as is https://docs.microsoft.com/en-us/dotnet/iot/deployment. I run the first command and below goes the output.

Wow. It installed the SDK. The above link is not at all talking anything about SDK. It's just talking about deploying the framework-dependent applications only. Let us check what is installed

Microsoft is great. We just asked .Net runtime. But we got SDK and ASPNetCore runtime as well. Now our RasPi is a full-fledged web server.

Once we have the installation ready. Get the published application. Make sure published as Framework-dependent and Target runtime set to Portable. Then run the normal command as below

dotnet "app.dll"

Closing thoughts

It is better to publish as a self-contained app to avoid the installation of .Net. The footprint will be big but it is easy to clean up. There will be new .Net versions releasing every year and their patches. If we keep with those releases, the .Net installation itself may be a big footprint later. (I am yet to check what it means .Net 5 and .Net 6 installed side by side)

Happy IoTing.

Tuesday, July 13, 2021

Setting up home NAS - Part 4 - Raspberry Pi to build locally redundant NAS for home

This is the 5th post in the "Setting up home NAS" series. Below are the previous posts. It is not required to read previous posts to understand this. But that gives some background on this series.

Introduction

I was running below model for the home NAS system. My main contributor is the video category. My DJI Osmo Pocket produces high-bitrate videos. Also the RAWs.
  • Primary
    • A router attached USB drive working as NAS. \\192.168.1.1\share. It is of 1TB capacity
    • Sync the files to my personal computer that has a 500GB drive. So effectively getting only 500GB which are backed up. SyncToy is working fine for on-demand sync
  • Secondary (after publishing to YouTube)
    • Combine all the raw videos to single and upload to YouTube in private visibility
    • One back up to another external disk that has 2TB.
    • That means during editing time, 2 copies are in the router attached USB drive and personal laptop. After publishing, one uploaded to YouTube and the other copy in the different 2 TB hard disk.
As the COVID-19 pandemic slowed down and places got opened, I got chances to visit more places. Meaning more files to primary storage. One trip brings close to 10Gigs. The 500GB limit is almost reached its 3/4th capacity.

Problem

All my previous posts were explaining a problem and a solution. Every time a new problem. This time it is again going to reach the capacity and I had to do something to increase NAS storage space. As always I need two copies of files to be kept. Not an enterprise-grade NAS.

Requirement

This time I did some requirement engineering. Its nothing but looking at the past on how much data I was generating and forecasted how much more I would be in 

Below are some facts I could see
  • After I bought DJI Osmo Pocket there are a lot of videos coming out from trips
  • One trip produce 10GB on average
  • There are around 1.5 trips avg we are making per month. ~15GB
  • We shoot some videos at home as well. 2.5-3 GB
  • Adding the above + a buffer of 2GB ~ 20GB per month ~ 240GB/year ~ 1200GB/ 1.2TB for 5 years
    • Buffer is required for technical video downloads and anything which may come on our way.
  • There have to be 2 copies resulting in 2,400 GBs. But once published one backup is in YouTube itself with visibility private. So the final requirement is 1.8TB
There can be 2 systems similar to what I have now. Once published the videos can be moved to secondary.

Options

Is it time to think big or just add more drives? My YouTube channels are still in it's infancy. No hope to get monetized in the near future. The google ads revenue from Blogs is just enough to renew the https://joymononline.in site.

If I spend more and I lose interest in YouTubing, there will be trips but just photos coming out from those. Photos can easily be stored in 2 places by using Google Photos and one hard drive.

Currently, I have one more 1TB internal hard disk which is taken from the personal laptop when it was upgraded to SSD. Total of 1 TB hard disks x2, 2 TB hard disk x 1, and 500 GB on a personal laptop.
Below are the options I could find 
  1. RaspberryPi 4 or a similar low-powered device. Connect 1 TB hard drives to it and use as primary. Secondary continue as it
  2. Dedicated NAS device.
  3. Build a server machine by sourcing refurbished parts.
  4. Store in the cloud. OneDrive/Google drive etc...
If the budget is not a constraint, I would be going with the cloud option only. 

Solution

Finally decided to go with RaspberryPi 4. Below are the rationale
  • Its low power
  • It can be used for something else
    • If I lose interest in Youtubing which reduces the data generation.
    • If the OneDrive or Google Drive drastically reduce their price for me to afford for 2TB.
    • If our total family income increases and gets more budget to tech things cloud storage would be affordable. Yes, we do some family budgeting on the expenses. It is a big topic on its own
  • I am already planning to learn Linux and would like to learn the shell way. Why don't I learn with my own problems?
  • To advance my career, I would like to learn more about enterprise IT concerns. Dealing with my own problems would be a good starting point
  • Obviously, my requirement of 1.8TB for the next 5 years can be satisfied with this setup. The only problem would be the slow publishing of videos which causes more videos to stay in primary storage which has only 1TB capacity.
The architecture would be similar to what I am using now
  • Primary storage
    • 1TB connected to RPi, expose as \\SMB shared path
    • Backup 1TB attached to the router. 
    • Daily sync RPi connected the drive to the router attached one
    • We will be seeing why can't I just connect 2 HDDs to RPi 4 which has 2 USB 3 ports
  • Secondary
    • Same setup as of now

Home NAS using Raspberry Pi

Finally, we are discussing the business. Let us see what are the decisions, steps and issues faced.

Decisions

There are some decisions to be made

Size of RPi

The RPi 4 comes in different sizes based on the RAM. Many users say it requires only 2 GB to run as NAS. 8GB would definitely be overkill. So settled on 4GB RPi

Powered USB Hub

This is more electrical than setting up something. The very basic is any electrical equipment needs a power source. When we connect the hard disk to RasPi via a USB port, the power source of the HDD is RasPi. If RasPi cannot provide enough power to the HDD, it cannot function normally. We know the voltage is 5V but that is not all. We need to understand the maximum Watt requirement of HDD during its operation. Rotational Disk-based HDD requires the highest power to start spinning up. RasPi should be able to give that power though it may require less power during operation. In order to connect the dots, we need to consider the current as well which is measured in Amperes often noted in devices using either A or Amps or mA (milli Amps). Below is the relation that we learned in school.

W = VA

or

W=V*A (just for developers)

If one device specify W and V and another device specify V and A we can kind of do this calculation to see whether they match up 

Specs

It's time to read specs that nobody likes. RasPi specs say all 4 USB devices can together draw 1.2A of current. We know the voltage is 5V. So the max Power that can be given out through all the USB ports is 1.2 * 5V = 6W

In my case, I have 2.5" a laptop drive which has a requirement of 1.2Amps during spin up and an operational requirement of .8Amps. Meaning I can connect only one HDD to the RasPi directly at a time without an external power source. If I need to connect both the HDDs to RasPi, I would require a USB hub that has its own power source. Or buy another external HDD that is powered by a separate adapter.

This is the reason why I had to still connect my backup HDD of primary storage to the router. The router has enough power to drive HDD.

RPi OS

There are many operating systems available for RasPi. Even we can have Windows using its IoT Core edition. But decided to go with Raspberry Pi OS (Rasbian) as that is targeted to this device.

HDD FileSytem

Prefer to go with NTFS than Linux native Ext format. The main reason is in case RasPi fails I can connect the HDDs to my personal windows laptop. Planning to slowly migrate to Linux by starting with USB Linux installation with persistence storage.

Sync method

Our aim is to have one HDD connected to RasPi and another HDD to router and sync them. One more decision to be made is how to sync these 2 HDDs. There are 2 options I could find though they are not for solving the same issue and mutually exclusive.

  • RAID

There are already articles available on how to set up. Here is one good article on the same. I don't recommend this approach as this is mirroring. As soon as we do a change, it's replicated. No way to get the old copy in case we accidentally delete something.

  • RSYNC

This is a utility command which can sync 2 folders. The command has to execute to get the sync to happen. We can schedule easily during off-hours. Since it's home use, any time starting at 1 AM is fine. But the time depends on how your family members use the system.

There are disadvantages as well. If we copy something in the morning then in the afternoon primary hard disk failed. We lose the data as the sync happens only the next day at 1 AM. Also, if we accidentally delete something and we recognize it next week, there is no way to retrieve it.

I decided to go with this approach. Below is the link
https://www.howtogeek.com/139433/how-to-turn-a-raspberry-pi-into-a-low-power-network-storage-device/

Steps to get NAS up and running from RPi

These steps are mainly based on the article above in the RSYNC section. But there are some additional steps. Only the deviations and issues faced are documented rest of this article. Better to read the above article before reading further.

Let us start with something, not in that article.

Setting time zone

When we set up for the first time, the timezone would be the UK hence the time. If the location is not in the UK, it is better to change the time zone. Changing the timezone will update the time accordingly. I am not adding the step here as it's simply obtained by google.

Mount points

The tutorial mentioned above already has an instruction to install the NTFS driver. That has to be done before mounting the NTFS formatted drives. 

There are 2 mountings to be done. 

First mounting the USB drive connected to RasPi. To check the USB drive detected or not, use the below command

Tuesday, December 1, 2020

Linux - script in command shell v/s triggered from cron

This is another Linux beginner lesson learned when setting up a home NAS using Raspberry Pi. Please skip if the difference between running a command from shell and cron is known.

Problem

The below command works fine when running from the command line.

Tuesday, November 24, 2020

Linux case sensitivity in mounted network path - ls v/s cp commands

This is about simple troubleshooting did in the Raspberry Pi (Raspberry Pi OS ) environment that related to path sensitivity. As most of us know when Windows guys start in Linux it happens. But here it's a little interesting as the issue occurred on a path that is mounted from a shared path using cifs driver.

If this is already known and feels obvious, please skip.

Problem

The below copy command failed.

Tuesday, May 26, 2020

[Video] Getting starting with Raspberry Pi 4 - 4GB - Part 1 - unboxing

This week I posted a video on unboxing Raspberry Pi 4. This is mainly to set up a home NAS at someday. Below is the video

Next Videos

This is just a plan. Let us see how things go forward.
  1. Unboxing [The above video]
  2. Setting up without keyboard and monitor
  3. Setting up NAS
  4. Serving a web site from RPI